Antsle Forum
Welcome to our Antsle community! This forum is to connect all Antsle users to post experiences, make user-generated content available for the entire community and more.
Please note: This forum is about discussing one specific issue at a time. No generalizations. No judgments. Please check the Forum Rules before posting. If you have specific questions about your Antsle and expect a response from our team directly, please continue to use the appropriate channels (email: [email protected]) so every inquiry is tracked.
Self-Managed backups from Gentoo antsleOS to CentOS antsleOS
Quote from acnicholls on June 3, 2020, 1:51 pm@spollock
Thanks, I tried moving my self-managed backups into that folder, but the OS still doesn't see them under "Heal Antlets" nor on any of the 'new antlet with the same name' tabs either.
It seems antsle support is offline for some reason, the chat has been unavailable for a couple of days and the antAid tunnel can't find any servers since earlier today. I've been in contact with them via a ticket though and they provided me with a way to downgrade back to the Gentoo version, so if I don't hear from them before Friday, I'll spend my weekend trying to go back to the old setup.
Then I'll take some Windows backups, and get all the necessary settings off of the Win machines, then re-upgrade to CentOS based antsleOS and create new antlets. Finally, I'll restore the windows backups, assuming of course that Microsoft will allow that, since the backups will not be from the 'same' machine.
Quote from spollock on June 4, 2020, 7:10 amI've developed a process on antMan3.1.0b that will successfully allow restoring kvm and lxc antlets from cloud backups.
LXC
1. Create a new antlet using an LXC template name it the same name as your backed up antlet name. This will simply be a "Fake" that will be deleted later but it needs to be there as the restore process complains about not finding the source antlet and fails.
2. Retrieve the backup file from cloud
3. From the 3-dot menu on the right, select "Restore as Clone"
4. Fill in the info, using a different name for the antlet, and select LXC for the Antlet Type.
5. Click Create Antlet
6. After completion, delete the "fake" antlet.KVM
1. Create a new antlet using the BlankKVM (use the Blank- Virtio template for linux antlets and the regular Blank KVM template for all others) template name it the same name as your backed up antlet name. This will simply be a "Fake" that will be deleted later but it needs to be there as the restore process complains about not finding the source antlet and fails.
2. Retrieve the backup file from cloud
3. From the 3-dot menu on the right, select "Restore as Clone"
4. Fill in the info, using a different name for the antlet, and select KVM for the Antlet Type.
5. Click Create Antlet
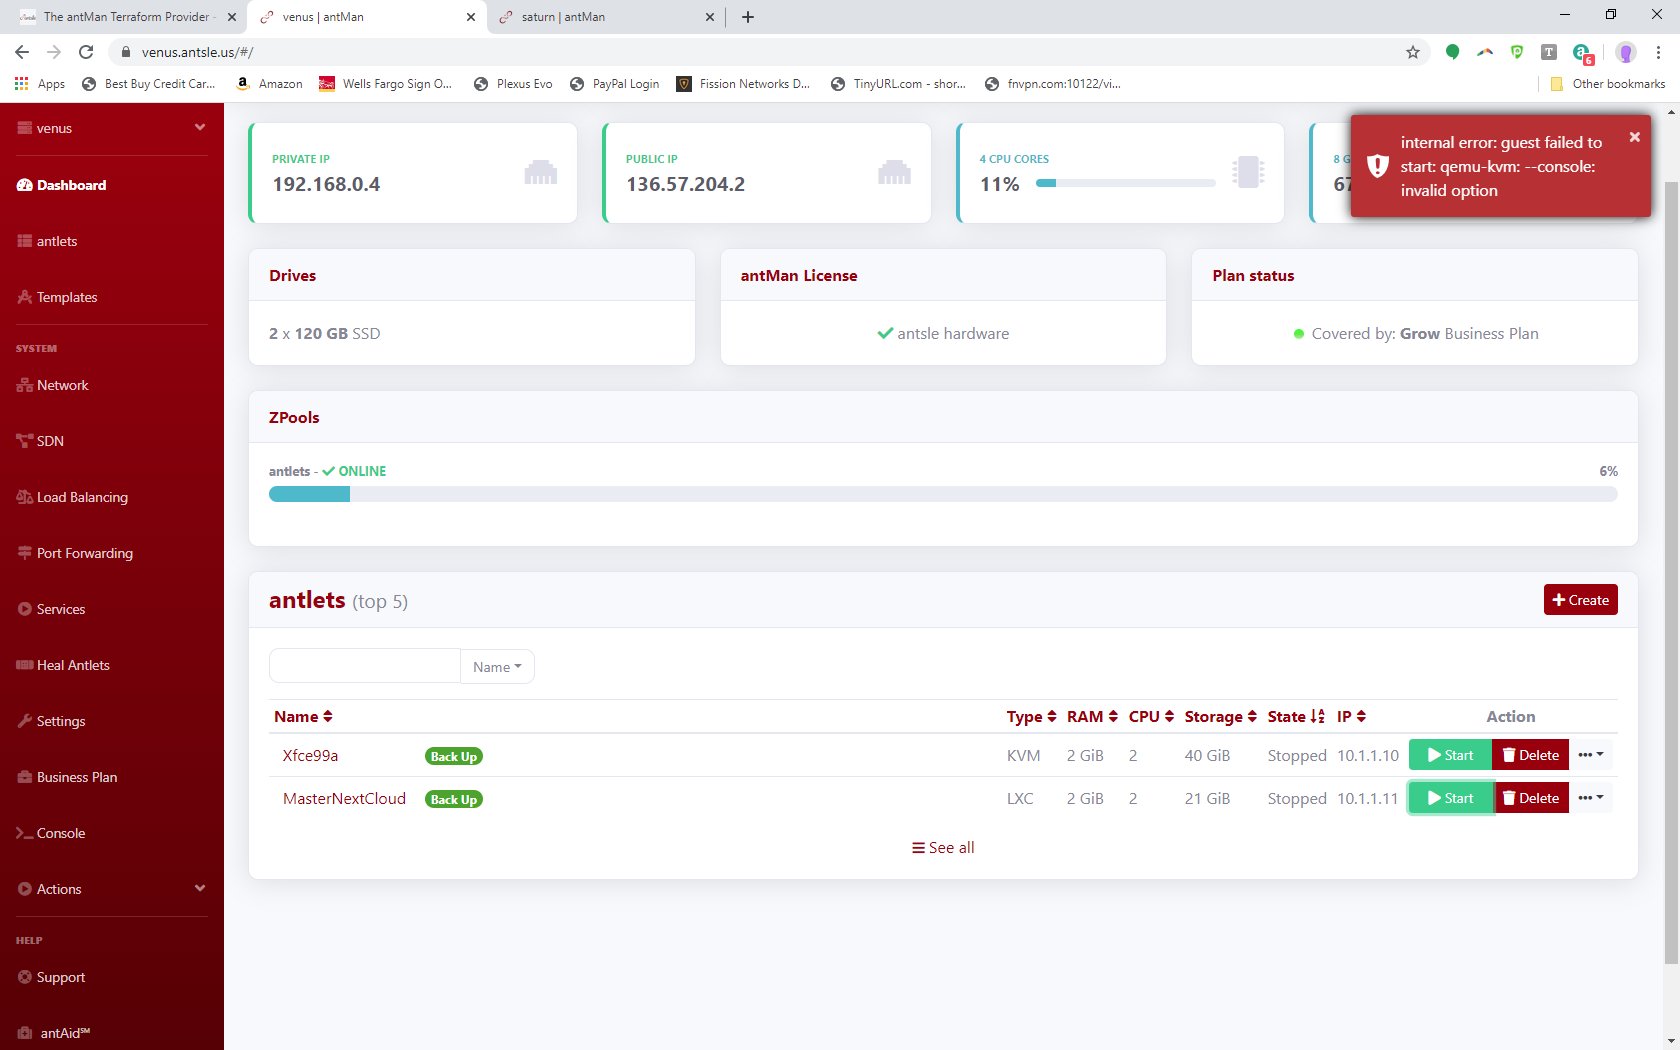
6. After completion, delete the "fake" antlet.Antman 3.1.0c FIXES the KVM antlet issue and they seem to restore and restore as clone without any "fake" antlets needed, however it breaks the LXC restore process because it tries to launch a console with it.... LXCs don't have a console so it fails.
I've developed a process on antMan3.1.0b that will successfully allow restoring kvm and lxc antlets from cloud backups.
LXC
1. Create a new antlet using an LXC template name it the same name as your backed up antlet name. This will simply be a "Fake" that will be deleted later but it needs to be there as the restore process complains about not finding the source antlet and fails.
2. Retrieve the backup file from cloud
3. From the 3-dot menu on the right, select "Restore as Clone"
4. Fill in the info, using a different name for the antlet, and select LXC for the Antlet Type.
5. Click Create Antlet
6. After completion, delete the "fake" antlet.
KVM
1. Create a new antlet using the BlankKVM (use the Blank- Virtio template for linux antlets and the regular Blank KVM template for all others) template name it the same name as your backed up antlet name. This will simply be a "Fake" that will be deleted later but it needs to be there as the restore process complains about not finding the source antlet and fails.
2. Retrieve the backup file from cloud
3. From the 3-dot menu on the right, select "Restore as Clone"
4. Fill in the info, using a different name for the antlet, and select KVM for the Antlet Type.
5. Click Create Antlet
6. After completion, delete the "fake" antlet.
Antman 3.1.0c FIXES the KVM antlet issue and they seem to restore and restore as clone without any "fake" antlets needed, however it breaks the LXC restore process because it tries to launch a console with it.... LXCs don't have a console so it fails.
Uploaded files: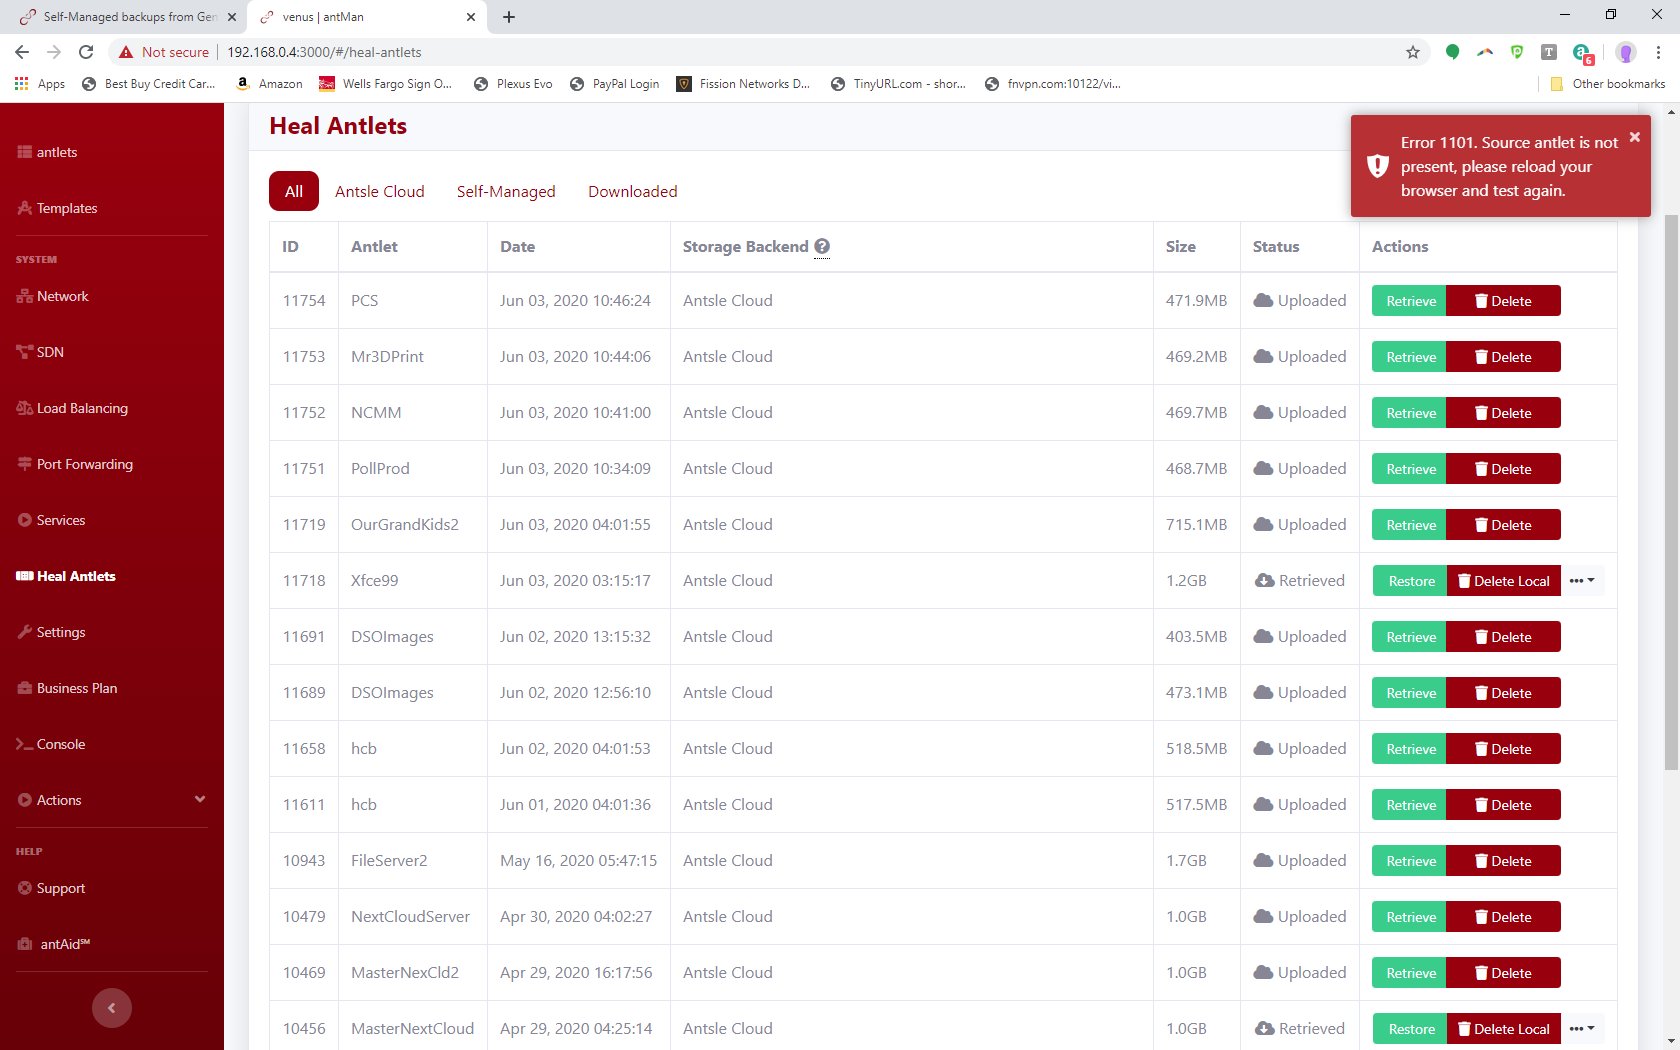
Quote from acnicholls on June 4, 2020, 8:57 amhey @spollock
Thanks for coming up with that. However, my antlets were not backed up to cloud and my DC antlets name is also no longer accepted by the create antlet form for being 2 characters too long. also, Local Self-Managed backups from the Gentoo version are named backup_local_<GUID>.zfs.gz and I'm guessing that the GUID value is random, because it doesn't even match the one in the contained xml file. However, they are not seen in the CentOS antman system at all that I could find regardless of them having the same name as a newly created antlet!!!
I did, however, come up with a process that works. In another post Johannes (mentioned and linked earlier) gave someone scripts for exporting/importing antlets, and I read through the commands that are used in order to come up with this process.
I tried running the import-antlet script after finding it in /usr/local/bin (find / -name '*import*'), but it failed when trying to remove the 'export' snapshot, because the snapshot name used for export is different than the one used for local (Self-Managed) backup. So I tried running every step of the script manually from command line and skipped the steps that I knew/thought would fail, or were not required.
This process is a mix of commandline and antman, since I am relatively new to shell scripting and I didn't want to try automating the editing of the xml quite yet.
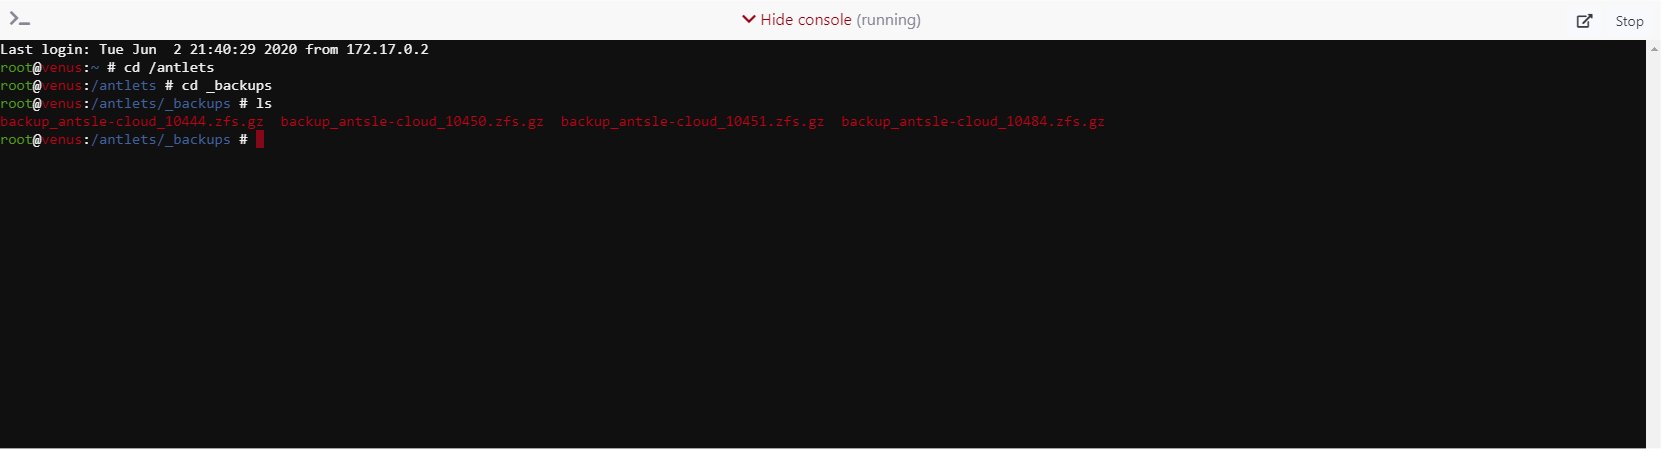
- first on command line decompress the backup using "gzip -d [backup file name]"
- next create a new zpool for the antlet using "zfs receive [zpool name]/[antlet name] < [decompressed backup file]", I found this in the import-antlet script file that was posted here.
- now you have a zpool mounted at /[zpool name]/[antlet name] for example /antlets/websrv1. cd to this folder
- create a copy of the antlet-libvirt.xml file that you will find in this folder
- edit the antlet-libvirt.xml file, you will need to edit several parts
- edit the <name></name> node if you want to change the name that appears in antman
- under the <os> node you will see a <type> node, edit the "machine" attribute to have 'pc-i440fx-rhel7.0.0' as a value, instead of 'pc-i440fx-2.4'
- under the <features> node, remove the <vmport state='off'> node
- under the <devices> node, edit the <emulator></emulator> node to contain /usr/libexec/qemu-kvm as a value, instead of /usr/bin/qemu-system-x86_64
- under <devices><disk> edit the <source> node's "file" attribute to point to the correct qcow2 file for each drive your antlet has, if required. This should be in the new zpool that you created in step 2 above "/[zpool name]/[antlet name]/[qcow2 filename]"
- remove any <interface type='bridge'> nodes the file may have, as the start up process fails if the old bridge exists
- save the file
- now we will create the antlet using the commandline (modified from the import script) enter the following command "virsh -c qemu:///system define <path to antlet-libvirt.xml>", your antlet will appear in antman now, with the name under the <name> node.
- now in antman, re-add the bridge network interface, if required and check that everything looks correct, you should see under Snapshots a single snapshot called "_antsle_backup", this is why the import script fails
- finally, you should be able to start your antlet.
I was able to get 4 of my 6 Windows antlets back, my SqlServer machine and my 3 web servers are all back and running with no problems. yet.
My DC fails into a System Repair which i can't execute because (I think) the local machine Administrator account is disabled. I didn't think that it needed to stay enabled once I had the domain created, but I won't make that mistake again. I think it's going into System Repair because some signature that the DC needs and relies on changed between virtual hosts.
My Win10 antlet was created from the Win10 template (Win10v1607)and then upgraded to Win10v1909, but when I start it, I get a blue screen stating that a required device is missing. It was just a template that I was using to create fresh install machines for testing, so it can be rebuilt in no time.
so now, I just have to create a new DC, and join all my machines to it and I'll be back where I was at this time last week, except I'm running edgelinux 2.0 on my antsle!
hey @spollock
Thanks for coming up with that. However, my antlets were not backed up to cloud and my DC antlets name is also no longer accepted by the create antlet form for being 2 characters too long. also, Local Self-Managed backups from the Gentoo version are named backup_local_<GUID>.zfs.gz and I'm guessing that the GUID value is random, because it doesn't even match the one in the contained xml file. However, they are not seen in the CentOS antman system at all that I could find regardless of them having the same name as a newly created antlet!!!
I did, however, come up with a process that works. In another post Johannes (mentioned and linked earlier) gave someone scripts for exporting/importing antlets, and I read through the commands that are used in order to come up with this process.
I tried running the import-antlet script after finding it in /usr/local/bin (find / -name '*import*'), but it failed when trying to remove the 'export' snapshot, because the snapshot name used for export is different than the one used for local (Self-Managed) backup. So I tried running every step of the script manually from command line and skipped the steps that I knew/thought would fail, or were not required.
This process is a mix of commandline and antman, since I am relatively new to shell scripting and I didn't want to try automating the editing of the xml quite yet.
- first on command line decompress the backup using "gzip -d [backup file name]"
- next create a new zpool for the antlet using "zfs receive [zpool name]/[antlet name] < [decompressed backup file]", I found this in the import-antlet script file that was posted here.
- now you have a zpool mounted at /[zpool name]/[antlet name] for example /antlets/websrv1. cd to this folder
- create a copy of the antlet-libvirt.xml file that you will find in this folder
- edit the antlet-libvirt.xml file, you will need to edit several parts
- edit the <name></name> node if you want to change the name that appears in antman
- under the <os> node you will see a <type> node, edit the "machine" attribute to have 'pc-i440fx-rhel7.0.0' as a value, instead of 'pc-i440fx-2.4'
- under the <features> node, remove the <vmport state='off'> node
- under the <devices> node, edit the <emulator></emulator> node to contain /usr/libexec/qemu-kvm as a value, instead of /usr/bin/qemu-system-x86_64
- under <devices><disk> edit the <source> node's "file" attribute to point to the correct qcow2 file for each drive your antlet has, if required. This should be in the new zpool that you created in step 2 above "/[zpool name]/[antlet name]/[qcow2 filename]"
- remove any <interface type='bridge'> nodes the file may have, as the start up process fails if the old bridge exists
- save the file
- now we will create the antlet using the commandline (modified from the import script) enter the following command "virsh -c qemu:///system define <path to antlet-libvirt.xml>", your antlet will appear in antman now, with the name under the <name> node.
- now in antman, re-add the bridge network interface, if required and check that everything looks correct, you should see under Snapshots a single snapshot called "_antsle_backup", this is why the import script fails
- finally, you should be able to start your antlet.
I was able to get 4 of my 6 Windows antlets back, my SqlServer machine and my 3 web servers are all back and running with no problems. yet.
My DC fails into a System Repair which i can't execute because (I think) the local machine Administrator account is disabled. I didn't think that it needed to stay enabled once I had the domain created, but I won't make that mistake again. I think it's going into System Repair because some signature that the DC needs and relies on changed between virtual hosts.
My Win10 antlet was created from the Win10 template (Win10v1607)and then upgraded to Win10v1909, but when I start it, I get a blue screen stating that a required device is missing. It was just a template that I was using to create fresh install machines for testing, so it can be rebuilt in no time.
so now, I just have to create a new DC, and join all my machines to it and I'll be back where I was at this time last week, except I'm running edgelinux 2.0 on my antsle!
Quote from spollock on June 4, 2020, 9:18 amhey there @acnicholls Wow you've been busy! I'm glad you were able to get some of your machines back and running!
hey there @acnicholls Wow you've been busy! I'm glad you were able to get some of your machines back and running!
Quote from acnicholls on June 4, 2020, 9:23 amThanks @spollock
It was a lot of trial and error, and all on my own since the antsle guys have been online/offline for a few days. I'm sure that they've just been busy with all of their enterprise clients that have had to go through similar problems for their upgrades. I'm just glad I don't have to revert and do Windows backups. Building a new DC is a small price to pay to avoid that!
Thanks @spollock
It was a lot of trial and error, and all on my own since the antsle guys have been online/offline for a few days. I'm sure that they've just been busy with all of their enterprise clients that have had to go through similar problems for their upgrades. I'm just glad I don't have to revert and do Windows backups. Building a new DC is a small price to pay to avoid that!
Quote from spollock on June 5, 2020, 7:31 pm@acnicholls
Thanks for your invaluable info! Using your hard work, I was able to resurrect my long lost VPN server still running Debian 8.5
Though I must admit to using the easy way out...
I ran the import-antlet script you referenced... then edited the xml (lxc antlets are so much easier) I only had to remove the bridge network device.Then I added the antlet back using virsh -c lxc:/// define /antlets/VPN/antlet-libvirt.xml
and viola!
I have been fighting with getting a VPN running... I don't know why it doesn't work when I create a new VPN server... but this one does!
Thank you sir!
Thanks for your invaluable info! Using your hard work, I was able to resurrect my long lost VPN server still running Debian 8.5
Though I must admit to using the easy way out...
I ran the import-antlet script you referenced... then edited the xml (lxc antlets are so much easier) I only had to remove the bridge network device.
Then I added the antlet back using virsh -c lxc:/// define /antlets/VPN/antlet-libvirt.xml
and viola!
I have been fighting with getting a VPN running... I don't know why it doesn't work when I create a new VPN server... but this one does!
Thank you sir!